People are increasingly using digital photos, sharing them on social networks, sending them to friends. But at the same time, the good old paper photos, carefully collected in an album, are by no means forgotten. Homemade album models are especially popular now. The only question is how to make a photo album with your own hands beautiful and original. For beginners, this article will tell you step by step and in an accessible way.
For beginners, before making a photo album with your own hands, you need to study step-by-step instructions, be patient, and use the necessary tools and materials. The easiest way is to buy a ready-made kit for creating a photo album in a store, but it is much more interesting and cheaper to create using improvised means. In addition, all family members can participate in this entertaining process.
Looking at the finished album, one gets the impression that it is simply unrealistic to recreate this on your own. But nothing is impossible!
So, to create such a masterpiece you will need:
It is important when decorating the use of decorative details. It can be lace, fur or leather details, chains, beads, locks, etc.
How to make an album cover
First you need to decide on the size of the future photo album and choose a design style. There are a lot of interesting original ideas for design. The cover can be soft fabric, leather, paper, decorated with various elements. 
To make the back of an album cover measuring 25x25 cm, follow these steps:
- Measure and cut out a square from thick cardboard, with a side length of 25 cm.
- Cut a soft lining of padding polyester or foam rubber of the same size.
- Connect these parts with glue.
- Cut off a square of the selected fabric, measuring 26x26 cm. This extra centimeter is necessary for the convenience of folding and gluing the material with the lining.
- From above it is necessary to attach a sheet of white cardboard, which will hide the foam rubber and the edges of the fabric.
- The back cover of the photo album is ready.
The algorithm for making the front of the cover is slightly different due to the use of decorative elements. For example, you can make a window for a photo that will tell you in advance about the contents of the future photo album instead of the name.
This requires the following steps:
- Again measure and cut out a square of given dimensions from cardboard, but in the center you need to cut another square or rectangle.
- A soft lining and fabric for the cover are also cut out with a hole.
- Connect all parts together with glue.
- From the inside, insert and fix a photo into the window.
- From above, everything is closed with a sheet of white cardboard.
Then, in both blanks, neat holes are made with a hole punch at a distance of 1.5-2.5 cm from the edge. Rings or ribbon are inserted into them to connect the parts of the cover.
Pages and binding
You can not connect the photo album with a ribbon or rings, but arrange it in the form of a voluminous book with a binding. Accordingly, then the holes in the parts of the cover will not be needed. For album pages, it is better to take thick white paper. 
The sheets are interconnected as follows:
- It is necessary to cut strips of white cardboard 3 cm wide. With their help, the main pages will be connected.
- Then fold each strip in half lengthwise. To get a wider distance between the sheets, bend the connecting strip in the shape of the letter P.
- Carefully glue the folded strips to the pages. The uniformity of the entire photo album depends on this process.
The number of pages can be arbitrary and is determined only by the desire of the master and the availability of the necessary materials. After that, you can start making the binding.
This will require:
- Take a bandage or thick gauze, cut a rectangle 25 cm long and 3 cm wide more than the resulting album blank.
- Glue the fabric to the junction of the pages.
- Then you need to fix a piece of braid or ribbon along the top and bottom edges of the future binding. This will give the album a neater and more aesthetic look.
- From a thick cardboard of a suitable color, we make a spine that will hide the entire binding.
- Parts of the cover are glued to the bends of the spine.
Do not attach the spine to the pages of the product, otherwise they may not open well.
That's the whole secret of how to make a photo album with your own hands. Step by step for beginners it will not be difficult to create such a masterpiece. Now it remains only to fill the album with photos.
Scrapbooking technique in creating a photo album
Scrapbooking is an art form that creates and decorates original photo albums. Turning an ordinary boring album with photos into a unique story of our life. 
The origin of this technique goes back to the distant sixteenth century. At that time, notepads were at the peak of popularity for recording important dates, valuable tips, recipes, etc. By the end of the 17th century, books began to appear with additional blank pages for making notes and pasting illustrations. This was the beginning of the scrapbooking technique.
In the 19th century, with the beginning of the mass distribution of photographs, a real revolution took place - special pockets are made for photos, and the pages are painted with various colors and patterns. Albums for girls with pictures, photos and various inscriptions were especially popular.
Today, there are many ways to design photo albums, and scrapbooking is popular all over the planet.
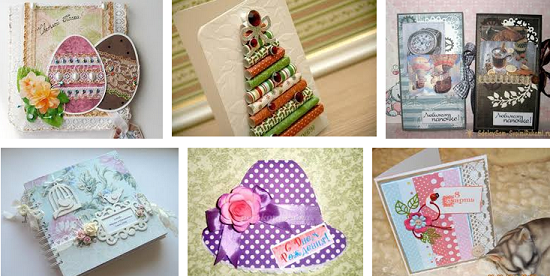
Ready sketches for pages
A sketch is a small page template for a future album. In scrapbooking, a sketch is a prepared sketch to speed up and make the work process easier. Ready-made sketches are just a godsend for beginners wondering how to make an original photo album with their own hands. Step-by-step selecting shades and pictures, you can easily create inimitable pages of the future album. 
These ready-made sketches are simply an inexhaustible source of ideas and inspiration! Gradually, in the process of work, templates will be used less and less, and soon they will completely fade into the background, freeing the way for the uncontrollable imagination of the master. Everything depends only on the desire to act and create. Such ready-made sketches are also useful for visualizing a future photo album.
After all, this is still a draft, on which there is always the opportunity to change and correct something, without causing damage to valuable materials for creativity in the process of making amendments. Sketches are used not only by beginners, but also by experienced masters. After all, sometimes one glance at the finished sketch is enough that your own idea of \u200b\u200bdesigning the pages of a photo album began to emerge in your thoughts.
Thus, unique handmade masterpieces are easily and simply created.
The theme of self-made albums
 Before you make a photo album with your own hands step by step for beginners, you need to decide on its theme and choose the right album decorations.
 Making an original photo album with your own hands, with the necessary tools and materials, as well as ideas for its design, is not difficult at all.
It remains to choose a plot and some significant event in life, for example:
- the birth of a baby;
- the first year of a child's life;
- graduation in kindergarten or school;
- wedding;
- birthday;
- trips.
In general, the theme of a homemade photo album can be any bright event in life, the memories of which you want to keep in memory for a long time. 
Another reason to do this kind of needlework can be to create a gift for relatives, colleagues or friends. It is enough just to make an original photo album and present it for any holiday of a loved one. Such a surprise will not leave anyone indifferent!
wedding album. Step-by-step instruction
The process of creating a wedding photo album is extremely interesting and exciting, because a piece of your own soul is invested in it. Beautiful happy newlyweds, their sincere smiles are the main characters of the emerging fairy tale, the beginning of a completely new life together.
An extraordinary feeling - after many years to pick up a shabby dusty photo album, flip through it and understand that love, true love, is not subject to years.
For beginners, before making a wedding photo album with your own hands, you should study the step-by-step instructions for its design:

In the process of creating an album, it is important not to overdo it with additional elements and decor, because photographs remain the main ones.
DIY album for a newborn
The birth of a baby is a new exciting stage of life together, filled with emotions and experiences. So I want to remember every moment, every smile of a child, his first clumsy steps. But over time, even the most vivid memories are erased from memory, dissolved in everyday fuss. Therefore, it is worth thinking in advance about the preservation of these emotions. 
For this purpose, a do-it-yourself photo album for a newborn is perfect. It will be interesting and exciting not only to view the pictures of the baby in the future, but also to participate directly in the process of its manufacture. Loving parents can show all their creative imagination and imagination, putting a piece of their love into the work.
Decor materials
When designing a newborn album, you want to use the softest materials and the most beautiful elegant elements. So that even through them tenderness and boundless love for the baby are transmitted. Pastel-colored velvet or velor is perfect for the cover.
Additionally, it can be decorated with such details:
- small plush toys;
- felt figures;
- lace;
- satin ribbon bows;
- beads and sequins;
- lace cap, booties, webbing with sliders, dummy;
- tags from the handle of a newborn;
- buttons and rivets.
In the process of decorating, it is important not to overdo it with the number of additional elements and harmoniously combine them with each other.
Making photo album pages step by step
For beginners, before making a photo album with your own hands, it is recommended to pay attention to the step-by-step instructions:

Homemade album is ready. It remains to put pictures of the baby in it, and it is important to fill the pages of the album regularly and with love.
Ideas for designing a children's photo album
There are many ways to design a children's photo album and make it unique and inimitable.
Here are some of them:
- It is better to save more little things, which in a few years will seem even more significant and interesting. For example, a tag from the first clothes of the child, a label from the first jar of puree or juice, the first diaper, a cut strand of hair.
- The child's name is welcome. What does it mean and why was the choice made on it.
- You can attach photos of your favorite toy and the first drawing of the baby.
- It is permissible to write down the words of a child's favorite lullaby.
- It is recommended to describe the process of introducing new products into the diet of a child, to consider his daily routine: rest, wakefulness, meals.
In general, you should listen to your heart and not be afraid of experiments! And then it will be easy to create a wonderful gift for a child.
Family photo album step by step for beginners
You can make an album with your own hands not only for some special event, but also for telling about family life in general.
You can use the following sections to create it:

It will take time and effort to create a family album, but the result will definitely justify itself.
Photo album in vintage style
An interesting idea for creating an album with your own hands would be a vintage-style photo album, i.e. "antique". 
This genre of creativity has a number of features:

It should be noted that black-and-white photographs with frayed edges will look more organic in such an album.
How to decorate pages and cover in an original way
Before starting work, it is imperative to think over the idea of \u200b\u200bthe future creation and sketch out sketches. On the draft, depict everything that is planned to be included in the album, to the smallest detail. This will allow you to visually consider the result of the work, taking into account all the nuances. The number of pages is calculated based on the number of photos.
Each sheet of the album must contain:
- the picture itself;
- name of the photo;
- description of each frame;
- decoration;
- additional decorative elements.
It is important to think in advance what kind of ink, color, font size and inclination of letters will be used to describe photographs. You can also use letters cut from a newspaper or magazine and assembled into whole words for this.
First of all, flat details are attached to the album, and at the very end - volumetric decorations.
For the original cover design, you can use a collage assembled from small pictures. It can be created in the form of a simple geometric figure or come up with a more complex decoration. For beginners, before making a photo album with your own hands, you should step by step figure out how and with what the finished copies are designed.
Otherwise, the process of creating the first album may cause some difficulties. It will be more convenient to design the pages before they are fastened into the finished product. It is important to remember that on one sheet, attention should be focused on one bright element in order to avoid information overload on the page.
Video how to make a photo album with your own hands step by step for beginners
How to make a scrapbooking photo album, see the video:
A simple do-it-yourself album:
The idea of book design for postcards and photos appealed to many lovers of handmade. Modern materials and tools allow you to create real masterpieces. You yourself can get to know this technique better, learn how to make scrapbooking with your own hands or special paper for this type of creativity.
In such a place it will be nice to keep memories of the most precious moments of life.
A fashionable direction in needlework allows you to design and create family and personal photo albums in various styles.
- European - a minimum of decor, the main attention is focused on the photo and its shape.
- American - the composition consists of many elements and decorations, represents a single whole.
- Clean and simple - original solutions for free space, simplicity and accuracy.
- Shabby chic - lace, bows and ribbons are combined with elements of drapery and scuffs.
- Vintage - the atmosphere of antiquity and the spirit of Victorian England.
In this technique, you can perform various crafts for the home.
His common techniques are:
- cropping - photos are cropped so that only the most important details remain;
- stamping - various applicators and stamps with drawings are used;
- decoupage - special pictures are transferred to paper and other surfaces;
- journaling - small inscriptions and tags with its description are placed under the photo;
- distressing - a method of aging paper with ink is used.
They can use almost any material - from colored paper to thick fabrics and dried flowers. It all depends on your imagination and the given topic.
Necessary materials

List of tools and materials that will be needed for work
Beginners often ask themselves the question - how to make scrapbooking with their own hands and where should they start? For them, there are special sets of already assembled scrap paper. For non-you will need special tools:
- different types of scissors for cutting;
- punches and stamps;
- sharp clerical knife;
- glue, ruler and tape;
- cutting mat;
- decorative accessories.
How to make DIY scrapbooking paper
You can not buy a whole set, but make all the blanks yourself. To do this, follow the instructions on how to make DIY scrapbooking paper.
You will need - colored or white cardboard, napkins with decoupage patterns, sharp scissors, a spray bottle with water, an iron and ironing board, food thermal film.
- Separate the bottom layers from the napkin and iron the top one so that there are no folds or wrinkles.
- Lay the cardboard and evenly spread the thermal film on it.
- Place the prepared part of the napkin on top, aligning it with the edges of the cardboard so that a few millimeters of the film protrude beyond the edge.
- Cover the workpiece with a clean sheet of paper or the lower layers of a napkin and iron it with a hot iron.
- Turn the hot paper over so as not to dislodge the film and trim off any excess around the perimeter.
- Iron again - if wrinkles form, moisten them with water and repeat the procedure until they disappear.
So you can make scrap paper of any size, color and thickness, with any pattern you like, significantly saving on a store set.
DIY scrapbooking album - step by step
Creating albums is a more responsible and complex task, and at the same time incredibly exciting and interesting. If you don’t have your own ideas, you can get them from master classes on making a scrapbooking album with your own hands on the Internet.
Start with simple and small compositions that do not require a lot of decor, so you can practice gluing and decorating sheets so that further complex work turns out to be more accurate.

The choice of color and decor is a matter of taste for everyone
How to make a scrapbooking photo album with your own hands step by step:
- Take a sheet of thick white paper and divide it into 12 identical squares with a pencil and a ruler in three rows of four squares.
- Cut the sheet, separating the sectors from each other. Do not cut to the end one square on each side.
- Glue certain sections together to make a whole ribbon, fold it like an accordion.
- Assemble the album using washi tape or medium-thick paper, gluing the pages together so they don't fall apart.
- Make a book spine - glue a strip of tape of the desired size to its first and last page.
- Start finishing your album. Think in advance about its theme and the photos you will put in it, create some preliminary sketches.
- You can use any means at hand - stamps and curly scissors, small sewing accessories, pieces of thread and fabric, buttons and rhinestones. But remember that the smaller the album, the less voluminous details, otherwise its appearance will be far from ideal.
- Tie the finished item with a beautiful ribbon or sew it with an unusual thread. Optionally - write your name or its name on the cover in ink or paint.
DIY postcards using scrapbooking technique

Postcards look especially touching in this style for any occasion in life.
All you need to create an individual postcard is whatman paper, colored paper, scissors, glue and a little imagination. Depending on who it is intended for, its content and form may differ.
How to make a DIY scrapbooking card?
- Prepare the necessary items - colored paper, cardboard, scissors, glue, lace, ribbons, beads, artificial flowers.
- Make the base of the postcard out of heavy paper, preferably soft double-sided card stock. It can be colored, smooth or embossed.
- If you have a dark base, cut off a piece of light paper and place it in the wish area. Use ready-made templates for cutting even shapes.
- Do not be afraid to experiment, materials with different textures. They will give your product originality.
- For beginners, there is an easier way to create your own masterpiece. In the stationery departments, ready-made thematic sets for creating postcards are sold. They include all the necessary elements for creativity.
DIY scrapbooking notebook - step by step instructions
Small size scrapbooks are neat and easy to use, can be a good gift for a loved one.
You can make a scrapbooking notebook with your own hands using this master class.
- Make a blank from A4 sheets to make an A5 size notebook. Fold each sheet in half and stack them in a stack of three sheets.
- Sew the structure with a thick thread, fill the seam line with glue from the fold side so that the threads lock in place and you get a neat spine.
- Fix the workpiece with clerical clips and let it dry. Re-glue the joint with glue and press the satin ribbon against it so that its edges protrude on both sides - one short, the second long.
- Burn the edges of the ribbon with a lighter to keep them from fraying. Bend the short end inward and glue it again.
- Make a binder. Cut out three cardboard shapes. corresponding to the size of the spine, front and back of the workpiece with a margin of 0.5 cm.
- Move on to cover design. Place the binding pieces on the material that your notebook will be covered with - scrap paper, textiles or leather. Cut off the top corners of the cardboard.
- Cover the binding by folding the outer edges of the material inward. Fix them with glue. Mask the attachment points with a flyleaf - fold two sheets of thin office paper in half and glue them to the cover on both sides, first to the block, and then to the top.
- Connect the pages with the prepared block - glue the sewn folds to the spine, and then proceed to the decor.
- Design the notebook at your discretion - cut out various shapes from leather or colored paper, tint the pages, use lace, beads and buttons.
How to make a DIY scrapbooking wedding album
All young couples want pictures from the most memorable day of their lives to last forever. An original way to store them offers a master class in a DIY wedding scrapbooking album.
- Make an album, choosing the size of the sheets according to the size of the available photos.
- Place one picture on each sheet and deal with its design.
- Connect sheets of watercolor paper in pairs with glue, decorate them with gold patterns or use a stencil.
- For greater effect - run along the edges of the pages with a dry brush with gilding.
- Make separate substrates for your photos - apply pattern fragments on them with the same stencils, make cuts in their corners to fix the pictures.
- Take care of substrates for photo cards - stick lace, sequins or satin ribbon around their perimeter. Make sure that the pictures are not lost against the background of the design you have chosen.
- Cut out the cover from thick cardboard so that it is slightly larger than the size of the pages themselves. Paste it with velvet by analogy with the technique that is given in the manufacture of a notebook. Decorate the top of the cover with an applique of pearls or beads, small lace. For greater density - put a synthetic winterizer under it.
- For the convenience of viewing the wedding album - insert the rings into it. Make identical holes in the sheets and cover with a hole punch and fix the fasteners of the rings in them.
DIY scrapbooking flowers

The most delicate decor - various flowers
A variety of jewelry and small decorative elements allows you to create real miracles of handmade. But many needlewomen try to make various flowers and figures on their own. For those who are not afraid of difficulties - a master class on how to make flowers for scrapbooking with your own hands.
- You need - two hole punchers for 6 petals of different sizes, watercolor paper and drawing paper, food coloring, plastic stamens, cotton swabs, water and glue.
- Make flower blanks using hole punchers - two large parts and one small one per flower. Cut the pieces and place them in a container of water.
- Dilute the dye in the proportion that is necessary to obtain the desired shade. The brighter the color, the more paint and less water, and vice versa.
- Make sure that the paper elements are well saturated with moisture. Take them out of the water, put them in piles of 6 large and 3 small figures, apply diluted paint with a cotton swab.
- Drip a couple of drops into the middle of the flower, and then spread it around the edges. Press the stack of blanks on top so that the dye penetrates all the elements and set them aside to dry. To speed up the process, use a hair dryer.
- Collect the dried petals with accordions - put the extreme petals in the middle, and the ones following them under the middle.
- Glue the parts together, slightly shifting them relative to each other, place the smallest parts on top.
- Make holes for the stamens in the center of the resulting blanks. Thread them with a thin wire and fix them at the base with glue.
Scrapbooking valentines
Valentine's Day is a good occasion to please your loved one with a homemade postcard. Make your own scrapbooking valentines. To do this, follow the above technique.

One of my favorite holidays is Valentine's Day.
A couple of tips for those who don’t know how to make a scrapbooking card for February 14 with their own hands:
- make a valentine in red and pink saturated colors;
- use the symbol of the holiday heart as a form for blanks or decor;
- write a frank or romantic, memorable wish;
- think over the design and prepare the necessary materials;
- do not use expensive accessories if you are making a postcard for the first time;
- try to do the work neat and harmonious;
- Do not copy other people's ideas, bring something of your own.
Pedigree scrapbooking book
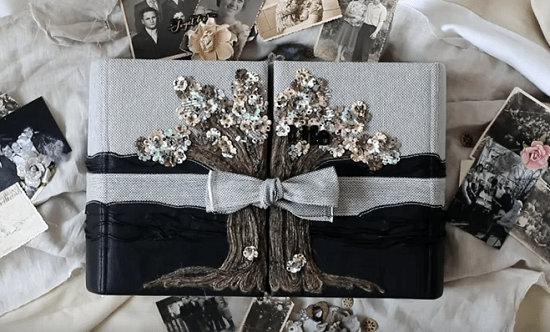
Design option for a family album in the form of a tree
The principle of operation is similar to a notebook or a wedding album. The scrapbooking family tree book made by their own hands differs from them only in some nuances.
- It must contain a family tree. It can be drawn by hand or executed in the form of an application.
- Under the photographs of family members, it is worth indicating the names and dates of the captured events, put a brief description.
- The design of the book is best done in shabby chic or vintage styles, applying journaling and distressing techniques to it.
- It is worth taking care of the volume of the album in advance - there should be enough space in it for photos of new relatives.
Taking pictures is a unique activity that is not only popular these days, but also helps a person to open up and show himself. Modern technologies allow not only to take high-quality photographs by inventing and improving modern technologies, but also to share them instantly.
Every day, every second person shares their personal or other people's photos on social networks, by mail. However, it is much more pleasant to fit comfortably and look through the album. Especially if it is decorated with clippings, quotes and interesting thoughts. Undoubtedly, the second such will not be found.
A lot of articles have been written about how to make a photo album with your own hands, a lot of videos with master classes have been shot. It's quite difficult to make a choice. However, there are basic knowledge and invaluable tips that are worth learning before getting started.
Choosing a theme for the upcoming album
Of course, the idea of creating a unique photo album with your own hands does not arise just like that. Perhaps a person is driven by the idea of making money on such things. However, most often the decision comes suddenly, after a significant event in the desire to save every bright moment.
Creating an ordinary classic album is not difficult. It is enough to have a few hours of free time and a rich imagination. You can decorate an ordinary photo album, or you can create your own album from scratch.
The most popular photo albums are:
- wedding theme. A wedding is a wonderful moment to start a new family life. The mass of events on this day exhausts the newlyweds, depriving them of the opportunity to enjoy this day and just contemplate each other. A professional wedding photographer is no longer a novelty. Beautiful photographs that convey every emotion of this day simply must be framed accordingly.
- Photo album for the birth of a baby. The arrival of a child in a family is an important milestone. And every parent strives to remember everything and display it in the photo. However, even the most attentive mother is not able to remember every important moment, because there are so many of them. A photo album with quotes will help you remember the most important thing even after many years.
- Album with a school, educational plot. The first day of kindergarten, first grade, graduation party, institute are the stages of growing up, which are accompanied by wonderful memories.
- Capturing a bright moment in life. This is not only a vacation, or a trip. You can also create an album as a gift, for example, for an anniversary, or for a memorable date. Thematic albums for beloved, beloved are popular.
The reason for creating a photo album can be anything. The main thing is the creative inclinations and the availability of tools.
Tools and materials needed to create a photo album
The original handmade album is quite an expensive thing. Its cost will include not only the price of the materials used, but also the dignity of handicraft. But this does not make such a photo album inaccessible. On the contrary, everyone can make it with their own hands, using their talent and imagination.
In order to make a photo album yourself at home, you must have:
Required tool:
- miniature scissors;
- hole punch simple;
- knife-cutter;
- pencils;
- paints;
- markers;
- glue stick;
- curly scissors;
- figured hole puncher;
- Double-sided tape.
Necessary materials:
- paper. It should be tight enough. You will also need paper for substrates for photographs, its density should be lower than the density of the main sheet;
- thick cardboard (2 sheets). You need it to create a cover. You can use old unnecessary cardboard boxes;
- cover material. To do this, you can use completely different material. Old pieces of fabric, jeans, decorative colored paper, to create a soft cover you will need thin foam;
- decorative material (depending on the general idea: fur, leather, wood, iron, beads, buttons, ribbons and other decor). You can make small details of the decor yourself: knit, sew, dazzle, dry.
Interesting details for your creation can be found both at home and in the scrapbooking store.
Making an album cover
When all the materials and tools are prepared, you can get to work. When making a photo album with your own hands, they often start with the cover.
There are two options for creating a cover:
- Use a ready-made one: buy a new one, or remove it from an old album. This method is the easiest. All that is required from the master is to decorate beautifully using decorative material. You can sheathe such a cover with any fabric (depending on the idea), use colored paper, various decor. Often this option does not require gluing the inside.
- Create a new one. This option is already more complicated. Since it requires certain knowledge. In order to make a cover, you need to decide what form the future album will be, how many photos to fit on 1 page. Having decided, you need to cut out a page from cardboard that we need in size. Do the same with the second sheet of cardboard. Next, you need to draw 2 lines on each sheet (2.5 and 3.5 cm from the left edge of the sheet). After that, cut with scissors along 2 lines.
To decorate the top of the cover with colored paper, you need:
- take a sheet of colored paper, 4 cm more than a cardboard sheet on all sides;
- place the album sheet in the middle and circle with a pencil;
- it is good to cover with glue a sheet of colored paper, or both parts of the cover sheet;
- put the cut sheet of the cover in a drawn square on a colored sheet of paper so that its edges clearly coincide with the drawn lines;
- wrap the remaining edges of the colored paper onto the cover, gluing them tightly. It is important to try to do this carefully so that the waters come out as even and beautiful as possible;
- also needs to be done with the trim of the inside of the cover. Colored paper can cover poorly glued corners.
When making the first albums, you should pay attention to the already finished covers. Building new ones from scratch can be tricky.
To work less on the cover design, you can use designer cardboard instead of ordinary cardboard.
Useful page design tips: how to fill the page correctly
It will be easier to fill the pages of the album in a disassembled state. Having issued each sheet, you can begin to collect the album.
Making an album is a whole science. Therefore, when filling out the page, you should follow certain rules:
- Initially, the semantic center of the page should be determined.
- Choose the right colors that complement the photo without breaking out of the overall color scheme.
- Choose decor for pages that will match in color and meaning.
- Choose captions for photos that will definitely correspond to the general meaning. These can be quotes of famous people, aphorisms, or your own thoughts. You need to write down words in the album based on the harmony of color.
- Arrange large and small details on the page should be based on balanced proportions.
- Each album page should have a bright accent. However, you should make sure that the page is not reloaded. It's hard to watch this album.
- Each page should visually resemble a triangle "photo - title - caption".
It's good if the page has an odd amount of detail.
In order for the page to be balanced, one should try to follow the rule: a large item - several small ones. For example, in the upper corner you can place a large three-dimensional detail, and in the opposite corner below, several small ones.

Family Album Ideas
Creating a family album is quite an exciting undertaking that can be a great project for the whole family.
A family album is not only a collection of family pictures in one book. With this album, it is important to convey the history of the family, its spirit, having collected all the memorable moments in one photo album.
A family album can consist of named pages:
- Little dad with grandpa or little mom with grandma and vice versa. This is an interesting idea that will help determine the similarities between all generations.
- The birth of a new family or marriage. Here you can also place not only the wedding of mom and dad, but also grandparents. Scanned documents look original, their clippings, newspaper clippings made in vintage style.
- The birth of a baby in the family. How to design this page is up to each mother individually. After all, everyone has their own ideas about the importance of a particular moment in a child's life. However, experience shows that a couple of pages are not enough for this event. Sometimes one album is not enough. The creation of mini photo albums made in the style of diaries looks original. It can be a whole series from birth to the right moment. Such an album is filled not only with pictures, but also with important records.
- First year of life.
- First time in first grade and beyond.
Pages that are intended for the baby can be supplemented with envelopes that will help save the first curl, the tag from the hospital, the first fallen tooth of the child.

A mother can supplement a children's album with her thoughts and memories. Addresses to your child, which he will read with pleasure when he grows up. You can also write down all memorable dates here: the first sound, laughter, the first word, the first step, the first tooth. Such records will be a great addition to the corresponding pictures.
Another great idea for a family album is to make a family tree.


When choosing the style of making a family album (any other too), it is important to maintain this style in the smallest detail. So old photos, baby pictures will go well with retro and vintage style. Decor for such an album can be found in grandmother's things.
Original do-it-yourself photo album design ideas
Before you start work, you need to complete its sketch. On a regular sheet of paper, outline everything, down to the smallest detail. So you can not only visually evaluate the final result, but also not forget anything. Do this with every sheet. Their number, by the way, must be calculated in advance at the rate of 1-2 photos per sheet.
The photo album page must have 5 elements:
- name of the picture;
- a caption for each photo: when, under what circumstances the photo was taken. Perhaps there is something important in the picture that you would not like to forget over time;
- page background;
- decorations;
- additions.
The blank pages of the album need to be marked with a simple pencil, so, after completing the design, it will not be difficult to erase the extra lines.
The page must be filled from top to bottom. The probability that paints, color works will be smeared will decrease to 0. To begin with, it is worth doing the work with a felt-tip pen and paints so that they have time to dry before the photo is pasted.
Inscriptions and quotes are written in the album with ink, felt-tip pen or helium pen. Ink color, font size, and letter tilt should also be considered in advance. You can use newspaper clippings to beautifully lay out the right words. Only after that the album is decorated with flat decorations. They are glued and sewn on. Volumetric parts of the decor are recommended to be fixed at the very end. Do this with glue, thread and needles, carnations.
It is better to glue the details of the album with a special glue gun.

Regarding the decoration of the album cover, the cover design looks beautiful with the help of small photos collected in mini collages. The form of these collages can be given completely different from banal geometric shapes to more artistic ones.
You can fasten album pages in various convenient ways:
- using massive rings. Then each sheet of the album must be processed with a hole punch, making a hole in the right place;
- use the same hole punch to make holes on each page and fasten them together with beautiful ribbons. In this case, you can use different methods of interlacing: from the simplest, all in to more complex;
- album pages can be stitched;
- you can glue the album.
Today, in the world of digital technologies, it is much easier to save your life in pictures. No need to sit for hours waiting for the result. Just a second and the perfect shot is ready. Most people store their photos on their gadgets, on the Internet. It is much more pleasant to look at photos, to touch them with your fingers. It is even more pleasant if this is an album with a unique decor, where there is something to remember, something to touch. Such an album captures, and every detail evokes its own emotions.
If there is a great desire, but no imagination, you can use ready-made ideas, which are quite a lot on the Internet. A lot of articles have been written about how to make a photo album with your own hands, a lot of master classes with detailed instructions have been filmed.
Valeria Protasova
Reading time: 12 minutes
A A
Who among us does not like to be photographed and photograph loved ones and loved ones? Over time, we accumulate a huge number of photographs at home, which, of course, we want to preserve and pass on to future generations. Therefore, today we will discuss with you ideas for decorating a family photo album with your own hands. It would be nice to make this pleasant activity one of the most, doing all the creative work on the design of the family album together.
Scrapbooking family chronicle - do-it-yourself vintage family album
Scrapbooking is one of the techniques for creating and designing family or personal albums. Where, in addition to photographs, newspaper clippings, postcards, buttons, drawings and other memorabilia are added that carry a story about you and your loved ones. Thanks to this art, instead of an ordinary album, we will get a whole story about the life of your family. The cover of the photo album can also be given an original look. Decorate it with some memorabilia - for example, a ribbon to which you can attach an amulet, or yellow maple leaves. On the cover you can put a beautiful inscription symbolizing something important only for you and your family. 


Making a family album in the form of a genealogical tree
Try to make your own family tree of your family and attach it to the title page of your photo album. It will not be difficult - list all the closest relatives that you remember and whose photos you can find in the family archive. First, add photographs of the most distant ancestors to the album, and finish the design with photographs of our days. Such a self-made photo album will be of interest to absolutely everyone - both the older generation and the younger. After all, considering it, you will have the feeling that you are reading a real saga about the history of your own family. 

How to make a family album with children's pages - ideas for designing a children's family album
Of course, one of the most important events in every family is the birth of a child. We always want to decorate this chapter of our life somehow in a special way. After all, even the smallest detail matters. We have a great many photographs of growing children, because we want to capture every moment of the life of a little man. And it can be very difficult to choose some individual photos from them to put in an album. But still try to select the most characteristic photographs that most clearly reflect important moments in the life of your baby. At first, these can be your photos, where the baby is still in your tummy. Next - an extract from the hospital. A newborn baby gets acquainted with family members and closest people. First smile. First steps. Walks. Deep sleep. Breakfast. For any mother, all these moments are incredibly important and everyone will remain in memory forever. Also in the photo album you can attach the first hairs of the baby, make decoration from the first booties, ribbons, from a lace baby scarf or bonnet. Do not forget to describe next to the photographs the events that are depicted in them. Over time, it will be possible to add your child's drawings and various school or sports trophies and certificates to the photo album. 


Do-it-yourself wedding family album - lace, satin bows and dried flowers from the bride's bouquet.
A wedding is a very important and special day for every woman. I want to keep in my memory every moment of this happy day. And, of course, we have a huge number of photographs that require a decent design. You can unusually decorate a wedding album by putting satin bows and lace from the bride's accessories into it. You can also attach dried flowers from the bride's bouquet to the photos, if you have them. All these little things will become more and more valuable to you over the years, and when you open a wedding photo album made by yourself, you will return to that magical day every time. 


The idea of designing a family album about a vacation with trophies from long journeys
We all love to relax, and from each trip we bring a bunch of photos. Naturally, these photos are also worthy of their photo album. You can decorate such an album with postcards depicting the countries where you rested, trophies from travels - whether it be a piece of a shell or a dried exotic plant. You can also make an ornament from the sand from the beaches where you sunbathed and took pictures. Don't forget about the descriptions of what is shown in the photos. After all, many years later, your children will be very interested to read about the adventures of their parents on vacation, and see colorful illustrations for this exciting story. 

How to make a family album as a gift to parents - a chronicle of the parental family
A handmade photo album is also a wonderful gift that you can present to your parents for an anniversary, or any holiday, or just like that. Collect the best photos of parents from all family albums to transfer them to one. When adding photos, add some words from yourself for your mom and dad in the description. Tell them how much you love them and how much they are dear to you. You can decorate the photo album with clippings from old magazines and preserved old theater tickets that your parents attended. An album for parents can also be decorated with hand-made decor items - an album cover crocheted or knitted, figurines for decorating a luxurious antique style, made by yourself. The album can also contain homemade collages, appliqué and decorative elements in vintage style, with antique lace and velvet. The flight of fancy here is simply limitless! 


DIY creative album - creating a family chronicle with photos, drawings, poems and stories of all family members
And, of course, every family should have a common album, looking at which is so warm and comfortable to spend time surrounded by loved ones. There are a great many ideas for creating such an album, and all members of the family will have to work on their implementation. Add your favorite photos to it in chronological order. Accompany them with poems of your own composition, let each of the family members write stories about some significant events. You can also collect children's drawings to put them in an album, small memorabilia. Bring all your creative impulses to life! In the photo album, in addition to photos, you can add everything that matters to your family. And then you get a real family illustrated chronicle, which can be left to posterity as a keepsake. 


A DIY photo album will breathe new life into your memories captured on film. After all, what if not viewing family photos on winter evenings, so brings family members closer making you appreciate each other even more.
Printed photos in a beautiful themed album are not only pleasant memories of a vacation or a special day in your life, but also a great gift for an anniversary or memorable date. A specially designed do-it-yourself photo album will help to make such a present really memorable and individually.
Unusual do-it-yourself photo album using scrapbooking technique
We will need:
- colored paper in several colors,
- scrapbooking paper with patterns or drawings,
- glue stick,
- stickers and ribbons for decoration,
- ruler,
- scissors,
- printed photos.
The number of sheets of paper should be twice the number of photos. Each sheet is folded in half. Then fold half of the sheets again - each half in half again to get an accordion with wings in one direction. On the first part of the sheets, which have one fold, we place photographs. The fold should go along the photo approximately in the center. We bend the photo, glue it to the paper. We make a “cover” from an accordion sheet. We cut a hole to the size of the photo with scissors, decorate the paper with stripes or figures from scrapbooking paper. We apply the “accordion” to the sheet with the photo with the central fold outward. Glue the "wings" of the accordion to the sheet.
Repeat the process for each photo, then glue the finished pages together. On the cover we paste on an additional colored sheet of a contrasting color, decorate with paper and stickers. Glue on the ribbons. Do-it-yourself author's photo album is ready.

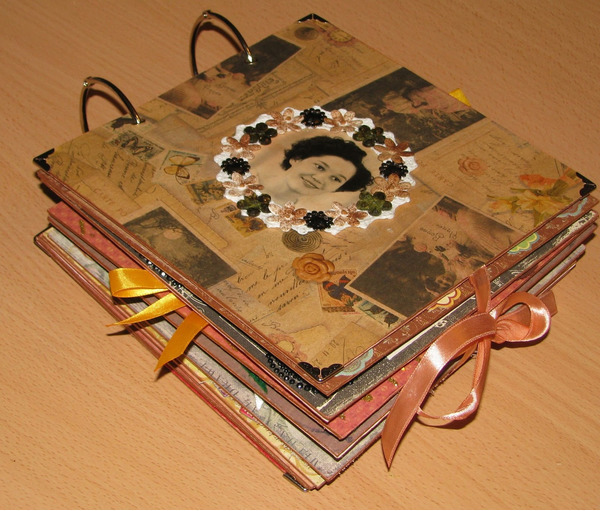
DIY photo album in retro style
We will need:
- a ready-made photo album with paper pages or a large format notebook,
- curly stamp,
- photo corners,
- glue stick,
- scissors,
- sponge for tinting the edges of paper,
- glue gun or Moment glue,
- twine, ribbon or braid for decoration (can be replaced with stickers),
- cover fabric,
- pictures or texts printed or cut out of paper "antique",
- photos.
We tint the edges of the sheets with a sponge in brown-yellow color, make strokes on the page, giving the paper an aged look. We put a “monogram” pattern on each page with a stamp. We lay out the photos, glue the corners, insert the photo. We add decor to the pages - stickers, phrases, pictures, ribbon bows or pigtails, pieces of ribbon. Glue with a glue gun. To decorate the cover, cut out a rectangle of the desired size from the fabric, glue it with a glue gun. We also glue the fabric inside the cover. If the joint is too noticeable - mask with tape or cord. Retro album is ready.

DIY wedding photo album
We will need:
- album rings with a diameter of 4 cm,
- regular and curly hole punch,
- cardboard,
- scrapbooking paper,
- scrapbooking stickers,
- chipboards,
- white cardstock,
- vintage paper tape with various patterns,
- paper, plastic or metal flowers,
- plaster figurines of the newlyweds,
- pearl halves on glue,
- openwork braid, cord or lace,
- glue squares for photos,
- glue,
- creasing stick,
- scissors,
- Double-sided tape,
- ruler.
From cardboard cut out 10 sheets of the same size. We make holes with a hole punch for the connecting rings. We select paper for decorating the cover and sheets in mauve, beige or pastel colors. Let's start with the cover. We cut out strips of paper of several colors with scissors, join them, glue the joints with adhesive tape. The finished sheet of paper should be larger than the cardboard blank. We place the cardboard on the paper, glue it. We wrap and glue the edges, making scoring tape along the edge of the cardboard and paper cover. We seal the inside with a solid sheet of paper. We decorate the cover with lace, roses, figurines of the bride and groom, pearls and a sticker. Similarly, we make the back of the cover, but do not decorate with voluminous details.

For pages we use individual decor. We glue the ends of the cardboard with vintage tape, glue the corners with an overlap. You can use the same pattern or style each page differently. We cut out stripes from white cardstock, decorate one edge with a figured hole punch. On the page we make a composition of two shades of paper - the top and bottom are plain, the central stripe is colored. To do this, we glue a plain sheet to the cardboard, then on top of it - a colored strip, close the joints with narrow strips of figuratively cut card stock. We glue the corners to the size of the photo, place the decor on the page, fix it. We fasten the finished album with rings.
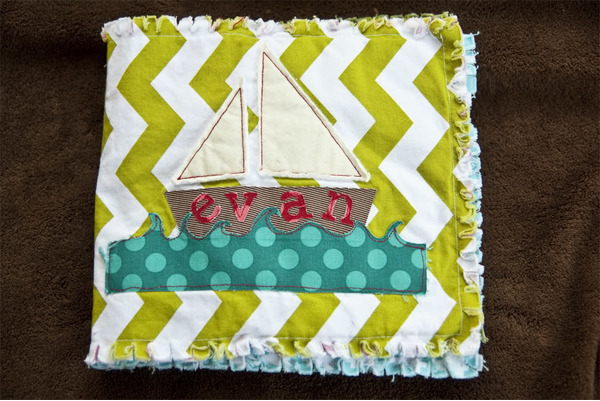
DIY photo album for a baby
We will need:
- album for drawing on a spiral fixer,
- ruler,
- scissors,
- pencil,
- printed baby pictures,
- spray glue,
- stickers,
- scrapbooking paper or wrapping paper,
- colored paper,
- ribbons and varnish marker to match the ribbons,
- double-sided adhesive corners for photos.
Crop the album to the desired format (preferably square). We decorate the cover using plain paper and ribbon. We make an inscription with a marker, draw any pattern on the back of the cover. We decorate each page with stickers, colored paper, place corners for photos. We add inscriptions, make envelopes for leaflets with the achievements of the baby. We cut out a heart, put it on a ribbon, glue a bookmark to the cover. Children's photo album is ready.


